
Updating to Alyce Salesforce 2.0
Notes: Updating integrations settings requires that you have Admin permissions for your Organization. Please reach out to your CSM for assistance if you do not see these options.
This instruction guide is for organizations who are updating their versions of the Alyce for Salesforce package to 2.0.0 or greater (the New Experience).
Note that these steps only need to be taken the first time that you update from a version lower than Salesforce 2.0 to version 2.0 or greater.
Alyce for Salesforce
Version 2.0.0 or higher
Step 1: Adding New Alyce Permission Set
Starting with Alyce for Salesforce package 2.0.0, an additional permission set is needed to enable real-time updates for gifts and campaigns.
To enable this new permission set, select “Assign Alyce Integration User Permission Set” to successfully add the Alyce Integration User Permission Set. This permission set should be added to the Salesforce user who is updating the Alyce + Salesforce integration.

After clicking “Assign Alyce Integration Use Permission Set”, you will be redirected to the settings page for this permission set. On this page, you will need to take the following steps:
- Click “Manage Assignments”
- Click “Add Assignments”
- Find the user to whom you would like to assign the permission set, check the box next to their name, and click “Assign”.
- Click “Done”.
Step 2: Disable Batch Jobs (If Active)
As part of the new experience of Alyce for Salesforce, all gift and campaign updates will be made in real-time via API (instead of batch jobs). Therefore, as part of the upgrade, please disable any active batch jobs that are running for your organization.
To do this, go to Step 3 in the Alyce Admin Panel (within Salesforce). For any batch jobs that are listed, click the “X” in the “ACTION” column to disable the batch jobs. Going forward, all gifts will be synchronized in real-time via API. If you would like to synchronize all historical gifts, you can return to this step and click the “Synchronize All Gifts” button.

Step 3: Authorize connection with Salesforce to enable Alyce to pass data to Salesforce via API
Within the Alyce Organization Settings, click “Authorize Connection” and then authenticate with your Salesforce credentials. This is the same page that you visited in Step 2 above and the links are included below.
Production: https://dashboard.alyce.com/settings/organization/integrations
Sandbox / UAT / QA : https://dashboard-sandbox.alyce.com/settings/organization/integrations
When prompted, elect to “Allow” data to pass to Salesforce. After authenticating with Salesforce in this way, your gifts and campaigns will sync between Alyce and Salesforce in real time.
NOTE: This step will need to be done with the same Salesforce user whom you designated to receive the Alyce Integration User Permission Set in Step 1.
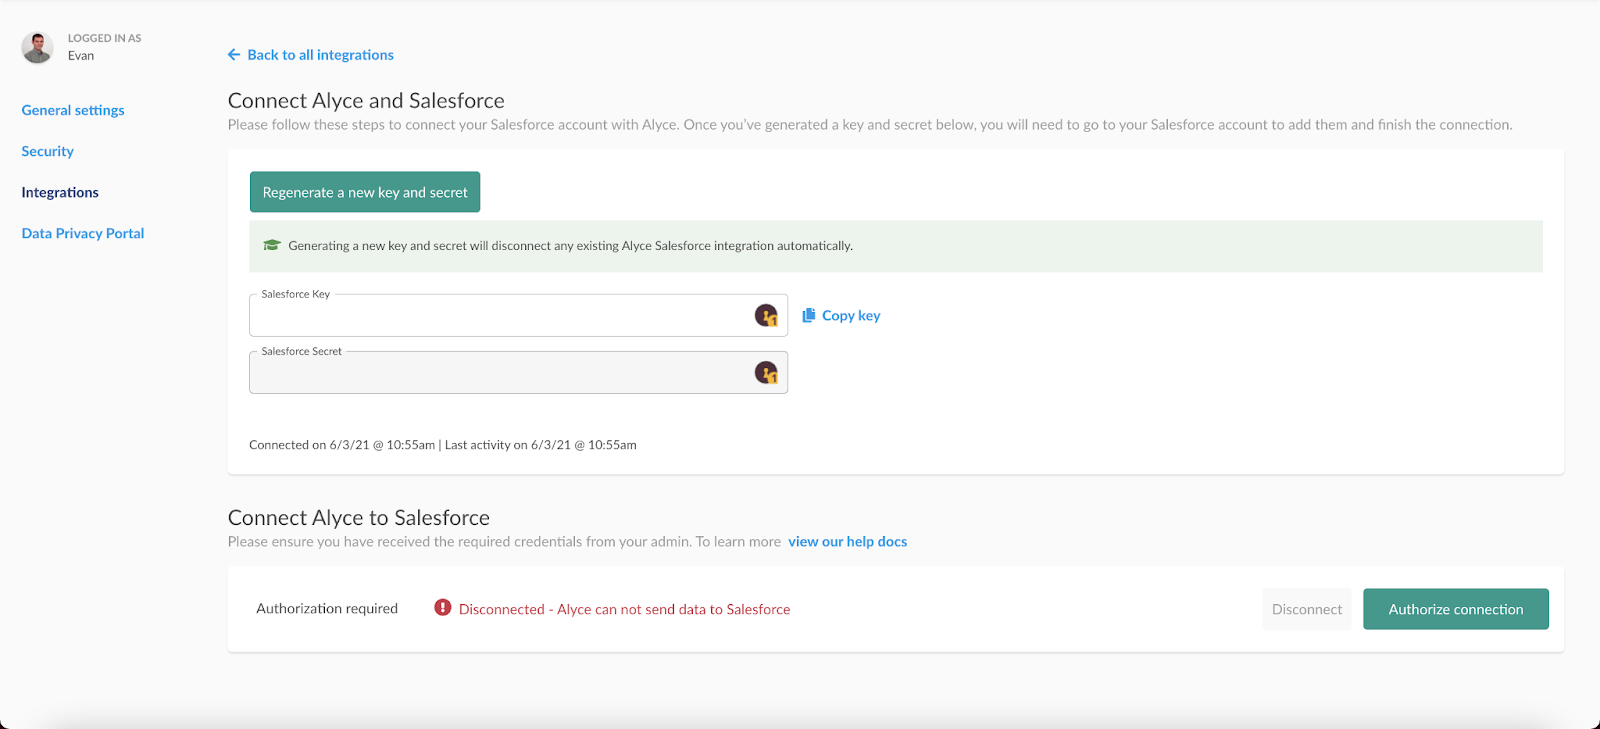
Confirm the Integration
To confirm that you’ve successfully upgraded to Salesforce v2.0 and above, ensure that you see the “Connected” status on your integration settings page ( https://dashboard.alyce.com/settings/organization/integrations) within Alyce.
If you do not see the “Connected” status, please ensure that you have completed all of the steps mentioned in this guide.
