
Trigger Gifts Based on 6Sense Stage (1:1 Campaigns)
Based on the criteria that you specify in this recipe, Alyce will automatically approve and add the corresponding recipients to the Alyce 1:1 campaign that you select.
Step 1: Before configuring this recipe, ensure that you have already created the corresponding Alyce 1:1 campaign to which you would like to upload your contacts.
Step 2: If you haven’t already, please set up the 6Sense Segment inside 6Sense that you would like to use for this recipe. You should also ensure that your 6Sense Segment Name Enrichment Orchestration includes the 6Sense segment that you are using in this recipe.
Step 3: To start this recipe, ensure that you have successfully connected the Alyce for 6Sense integration per this document.
Step 4: Choose the recipe that corresponds to the “Standard Object” or “Custom Object” based on what you discovered in How to Determine Which 6Sense Recipe to Use guide
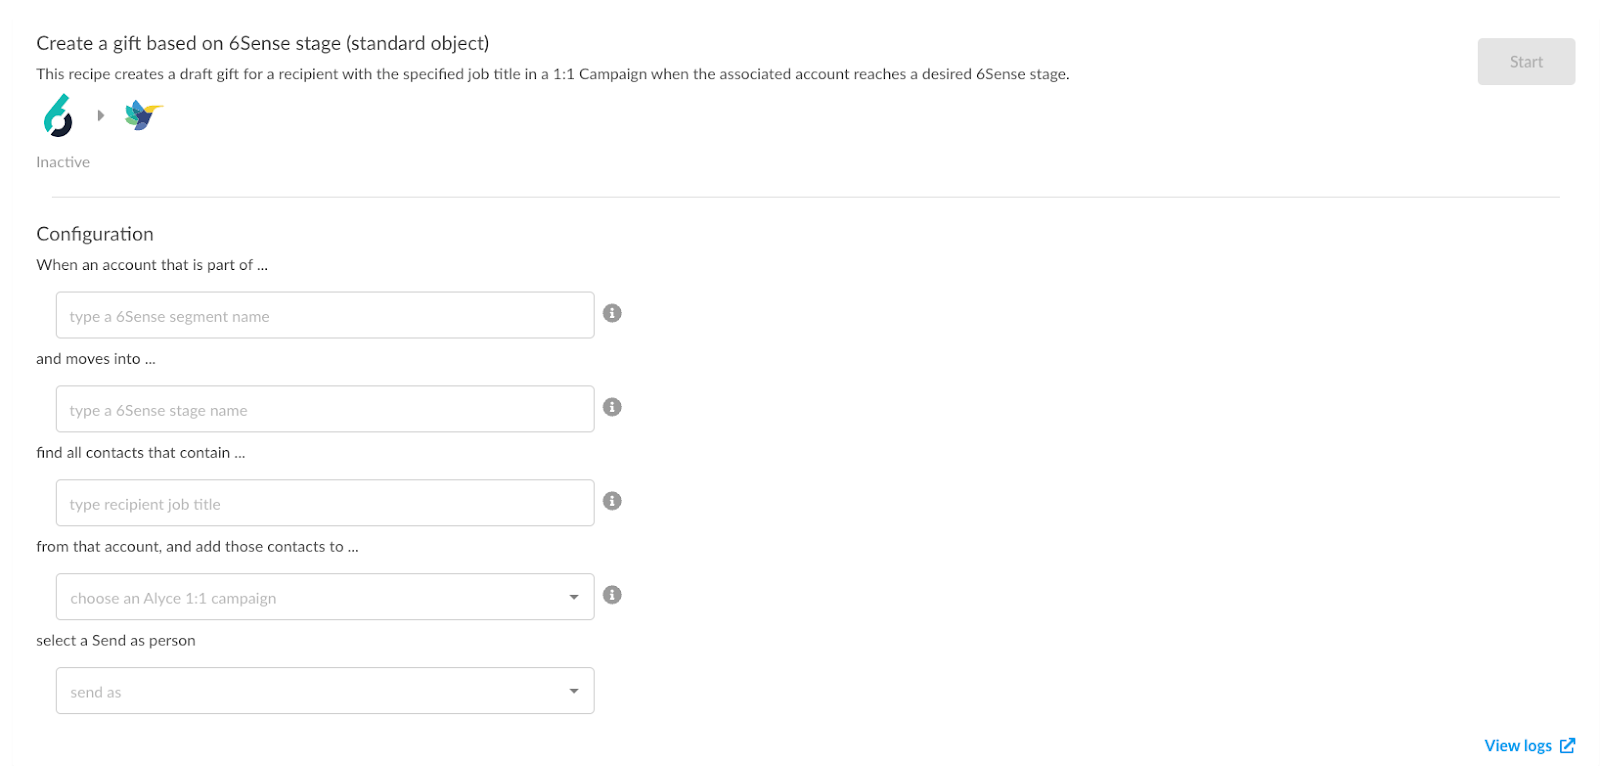
Step 5: Within the 6Sense segment name entry box, enter the exact name of the 6Sense segment that contains the accounts that you would like to gift. If you change the name of your segment inside 6Sense, you will also need to update this entry box with the updated name.
You may only enter one 6Sense segment name.
Step 6: Within the 6Sense stage name entry box, enter the name of the 6Sense stage(s) that you would like to use as your gifting trigger. Gifts will be triggered when the corresponding account moves into this 6Sense stage.
You may enter a single stage or multiple stages as a comma-separated list and these values are case sensitive. For example: “Decision, Purchase“ would trigger when accounts move into Decision or Purchase.
Step 7: Within the recipient job title entry box, enter the job title of the recipients that you would like to send a gift to. Recipients will be added to the Alyce 1:Many campaign if their job title in Salesforce contains the value that you input here.
This is case sensitive and you may only enter one job title. This can be broad such as “Marketing” or specific such as “VP Marketing”.
Step 8: Within the Alyce 1:1 campaign entry box, select the corresponding Alyce 1:1 campaign that you created/identified in Step 1 above. This is where the recipients will be approved and uploaded.
Step 9: Within the “Select a Send As person” dropdown box, select the user you would like to have the gift send from.
Step 10: Within the recipe, click “Start”.
Step 11: Once recipients are added they can be found under the selected Campaign > Gift Breakdown > “Gift Options Ready” Status. From here you can click on “Gift Options Ready” to open the draft gift and complete the gifting flow.

Congratulations, you have successfully configured your Alyce for 6Sense recipe!